
There are many different ways to carve an owl from wood, and each person will have a slightly different process. If you desire a realistic-looking owl, you could use a chainsaw to carve it. If you don't feel like using a saw, you can still use a knife. This will allow you to make fine details such as talons and individual feathers. Your owl will look more natural if you add plumage to the body. Finish your carving by smoothing it. Depending on the wood type, you might also consider applying a finish coat to protect your carving.
Chainsaw carving of an owl
If you have ever wanted to carve an owl, a chainsaw can be a great tool for the job. You can use the saw for carving the eyes, face, wings, feathers and beak. Learn how to carve the tails first. This will make carving an owl much easier. Once you have mastered the talons, you can add details as necessary. It is important to make sure that you check the chippings and fix any problems.
Personal protective equipment is essential if you plan to use a chainsaw. Chainsaws are extremely dangerous and you must wear safety glasses. You should also wear protective clothing and gloves whenever working with a chainsaw. This is especially important for large chainsaws, where you may be hurt. Chainsaws are best used when the wood is dry.
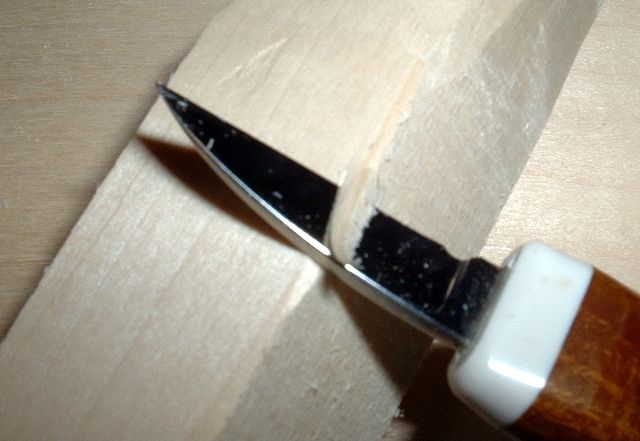
Using a knife to carve an owl
Drawing a heart-shaped shape on a piece wood is a good place to start when carving owls. Make sure the heights of both halves is equal. To separate the shapes, draw a vertical line. Cut the wings from the heart shape using a chainsaw. Once you are satisfied with the shape of the heart, paint it. Finish the work by adding feathers to it.

Once you've outlined the general shape of the owl, you can start carving. The first step is to draw the chin. You can also carve its wings and abdomen. You can also carve the tail or wing using the same method. Once you have carved out the body of the Owl, you can then use a carving knife for details such as hair and eyes.
Using a chainsaw to carve a face
Before you start carving your owl's face, it's important to know how to correctly block out the shape. First, mark a centre point on the wood using chalk. Then, trace the contours and eyes of the owl's beak and eyes. Once that's done, cut the heart shape using a vertical line. Finally, add feathers using a saw.
The next step in forming the owl's face is to sketch a shape for the head. Begin by measuring down half an inch on the back and front corners and drawing a line from these marks to the sides. You can trace the feathers of the head with a #6 pencil measuring 1/4 inch wide. Once you've completed these steps, you can begin carving the owl's face.
A chainsaw is used to carve feathers
Start by sketching a rough draft on your trunk if you wish to carve an Owl. Be sure to draw the cutting lines clearly and carefully. Then, use a chainsaw to begin carving the feathers. Work your way up from the bottom. The trunk's lower half should have contours to accommodate the owl's eyes, beak, and mouth. Next, carve a body for the owl. Follow the guideline carefully to make the carving look realistic and safe.
After marking the talons, cut the wood to the same depth from both sides. Use a v tool to create texture on the feathers if needed. You can then paint the owl the color you want after the carving is complete. You can even use a chainsaw to carve the talons!
Order an owl
Most people have unrealistic expectations when it comes to pet-owls. This lack of knowledge is largely the cause for ridicule, especially when a person tries to Google "owl pet." They are told that the owls will not make good pets, and that they can't be trusted to live for very long. While these people might be right, owls could make great pets if they are given the right resources.
First, consider the laws in your area. Many states do not allow domestic owl ownership, so you'll need a license or permit to keep one. Some states allow owls only for educational purposes, while others allow them as pets, depending on their behavior and potential danger to livestock. In some cases, though, it's illegal to keep owls as pets, so make sure to check your local regulations.
FAQ
How do I determine what kind of wood my project is made from?
Always check the label before purchasing wood. The label should detail the wood species, its moisture content and whether it has been treated or not.
How long does it take you to finish a piece?
It all depends on how large the furniture is. A smaller project like picture frames or boxes can be completed in a single day. Larger projects like tables and desks take many days. It takes time to properly stain and seal wood.
What is the average time it takes to finish furniture?
It depends on which wood you choose, how complicated your design is and what amount of finishing you apply. Hardwoods, on the other hand, are more durable than softwoods. Hardwoods are more expensive than other woods. They last longer and are more resistant to moisture. Finishing furniture can take anywhere from one week up to three months.
Statistics
- Overall employment of woodworkers is projected to grow 8 percent from 2020 to 2030, about as fast as the average for all occupations. (bls.gov)
- The best-paid 10 percent make $76,000, while the lowest-paid 10 percent make $34,000. (zippia.com)
- In 2014, there were just over 237,000 jobs for all woodworkers, with other wood product manufacturing employing 23 percent; wood kitchen cabinets and countertop manufacturing employing 21 percent. (theartcareerproject.com)
- Most woodworkers agree that lumber moisture needs to be under 10% for building furniture. (woodandshop.com)
External Links
How To
How can you accurately measure wood?
Wood measurement can be done using several methods. We use a variety of methods to measure wood.
A digital caliper can have two jaws, which open and close. One jaw holds the object being measured and the other measures the distance between them. Digital calipers are great for measuring small distances, such as thicknesses of wood.
Laser levels have an infrared light beam that projects a line across the floor. The laser emits red dots on the line. The line can be viewed down to determine if the surface has an even surface. Laser levels are ideal for checking the accuracy on large surfaces.
Bubble levels look similar to a compass. The device's center bubble is visible. As long as the bubble is centered, the device will tell you whether the surface is level or not. Bubble levels are great for checking the accuracy and precision of smaller areas.