
What are the parts of a pen? A pen is useful for drawing and writing. Below is a detailed explanation of the parts of a pen. This includes its Ink compartment, Thrust device (corner and smooth points), and Anchor points. Once you understand these components, you'll be able to use them efficiently and effectively. This article will also provide tips for how to maintain and fix your tool. It's a good idea if you have a reference that you can refer to when creating or fixing a pen.
Ink chamber
What amount of ink should be placed in the ink chambers of a tool pen? The ink should not contain any particles and be thick. The ink should be dry enough for paper transfer. The entire process shouldn't take more than 2 minutes. This process must be well designed. Here are some tips for pen manufacturing. You will learn how to make a quality pen. This guide will help you design the perfect pen.
The pen body is made from tungsten carbide balls. An outside company also supplies the ejector plunger and the tungsten caride balls. The other components can be made from different molds. Brass is used for the pen body and point. To soften the brass disks, heat is applied to them. These are then placed inside a compression chamber and shaped. The metal disc is then forced through the mold using a steel ram. The ejector plunger removes any brass left over.
Thrust device
The Thrust device is a serial data interface that allows for the creation and manipulation of vector data. Two types of data are supported by the device: pointer and vector. Vector data can be used to calculate and plot graphs, and other purposes. Vector data may be stored in either host or device memory. You can also use the device to perform data transformations.
The thrust device, which is made of plastic, measures approximately 2cm in length. The ink chamber is held by the thrust tube. Once released, the thrust tube releases the ink chamber. The pen comes with a clip made of metal that can be attached to thin objects. The pen's various mechanisms are kept in place by the 12cm-long casing. The pen's casing provides a firm grip. It makes it possible to hold the pen securely in one's hand.
Corner and smooth points
There are two types of anchor points in Photoshop: corner and smooth. Smooth anchors create a curving transition. Smooth anchor points that are corner or smooth create sinuous transitions. Both types of points can be created by the pen tool. You can switch between the two by pressing the arrow keys or holding down the Command key in MacOS. Once you've selected an anchor point, it is possible to adjust its properties.
The intersection of two line segments is called the cusp point or curved-corner Anchor point. In writing, it might remind you of a double fishhook turned upside down. It is used to make lowercase letters such as ms, Valentine hearts and other shaped letters. You can also use a combination-corner anchor point to create rounded-corner rectangles. The curved-corner-anchor point is more user-friendly than the straight cornerer one.
Anchor points
If you want to create a straight line with a tool, you must have an anchor point. This is what the pen tool knows, and it will recognize when you are looking for a straight line. Connecting two anchor points allows you to create shapes that have sharp corners or sides. If you're not sure how to connect these points, hold shift while clicking. If you hold shift before you click, you'll be able to set anchor points at the right angles. This will make drawing straight edges easier.
After you've selected an anchor point, you can click and drag it to make a path. You can delete the anchor point or move it to another location. You can also add anchor point and modify path using the Pen tool. The Pen tool can add corner and curve points, and you can also use the Direct Selection tool to select multiple objects. In Illustrator, anchor points can be a powerful tool. They are invaluable for creating curves and lines with precise lines.
Widget for pen elements

Widget for tools pen element provides access to a variety of functions and options. It allows teachers to add captions, add images and change their text size. To change the size of a textbox on a canvas, teachers can drag it to the tool. It can also be customized by adjusting the colour options. You can choose between the image uploader and the text tool. The image uploader allows teachers to add a photo to their lesson while the text tool can be used for input on a canvas. Images can be moved, scaled and rotated to add additional depth to the lesson.
The Pen Tool can take different forms depending on the task you're doing. The cursor indicates the action that is about to occur. You can also switch to restrict the tool's movements to 45°, 90°, 135°, 180°, and 120°. The Direct Selection Tool, on the other hand, deletes adjacent path segments. You can also use the Pen Tool to switch to Convert Anchor Point Tool.
FAQ
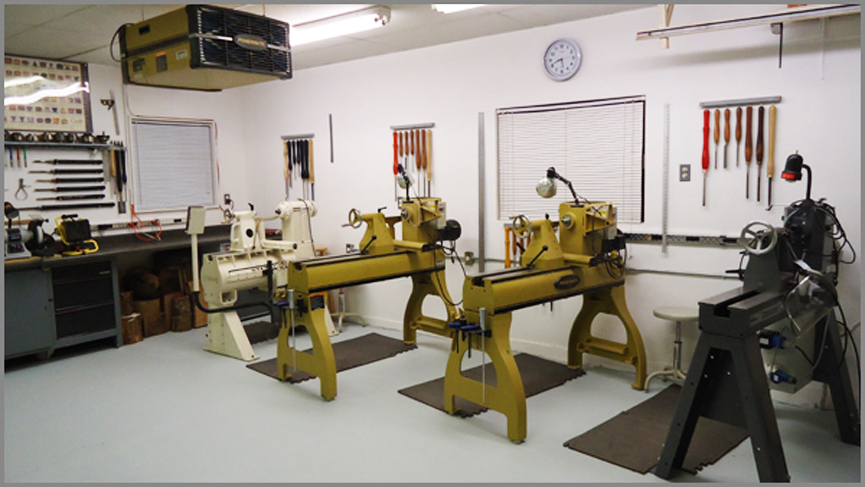
How much should a woodworker charge per hour?
The hourly rate for a professional woodworker varies depending on many factors, including skill level, experience, availability, location, and other variables.
A skilled woodworker can expect an hourly rate of $20-50.
A woodworker with less experience may be able to charge $10 an hour.
Where can I find free woodworking plans?
Woodworking plans can be found online without the need to purchase books or magazines. Just search Google. Search Google for "free woodworking" to see hundreds of sites that provide free plans.
Where do I get my woodworking supplies?
There are plenty of places where you can find everything you need to start out. You can visit your local hardware stores, or you can look online at sites like Amazon.com.
You might also consider flea markets and garage sale for any old furniture or other materials you could reuse.
What is the difference between a hobbyist or a professional woodworker, and how can you tell?
Hobbyists enjoy creating things out of wood. Professionals tend to focus on the quality. Hobbyists are proud of their creations and will often share them with family members and friends. Professionals will spend hours looking at designs before they start to build a project. Professionals will be meticulous about all aspects of their work, from selecting the right materials to finishing it.
What type of wood should I choose?
There are many wood types that are used in woodworking, including oak, maple and birch. Every type of wood is different and can have a unique look and feel that will affect the final product. For example, oak tends to be darker and harder than other woods. Birch, which is lighter and soft, is more heavy than mahogany. You can also choose between solid wood and veneers. Veneers consist of thin sheets made from wood and glued together to form a single layer.
What amount of money do I need to get started with my business?
Because every project is unique, there aren't exact numbers. But if you want to get an idea of how much money you'll need, consider these factors:
-
Materials cost
-
Tools and equipment
-
Time spent on the Project
-
Your hourly rate
-
What is your expectation for profit?
-
It doesn't matter if your goal is to hire help
You might start small if you are just starting out. You will gain more experience and be able to tackle larger projects.
Statistics
- If your lumber isn't as dry as you would like when you purchase it (over 22% in Glen Huey's opinion…probably over 10-15% in my opinion), then it's a good idea to let it acclimate to your workshop for a couple of weeks. (woodandshop.com)
- The U.S. Bureau of Labor Statistics (BLS) estimates that the number of jobs for woodworkers will decline by 4% between 2019 and 2029. (indeed.com)
- Woodworkers on the lower end of that spectrum, the bottom 10% to be exact, make roughly $24,000 a year, while the top 10% makes $108,000. (zippia.com)
- Average lumber prices rose about 600 percent between April 2020 and May 2021. (familyhandyman.com)
External Links
How To
How to stain wood
Stain wood is a process that involves applying chemicals to the surface of wood, which changes its color. The wood will turn from white to brownish-red due to the chemical reaction. Although oak is the most popular type of wood to stain, there are many other types that can be used.
There are several ways to apply stains to wood surfaces. One method involves mixing the stain and a solvent and then spraying it on the wood. Other methods use a solution of water and dye applied directly to the wood. You can mix stains into varnishes or paints to make them part of your finish coat.
Preparing the surface for staining wood is the first step. Clean the wood to get rid of any grease, dirt or other substances that might be detrimental to the stain's application. Sanding the wood removes scratches and imperfections. The next step is to choose the stain type you want. There are two basic kinds of stains: penetrating stains and non-penetrating stains. Penetrating stain penetrates deeper into wood than nonpenetrating, making them suitable for dark colors like mahogany. Non-penetrating stains work best with light colors like maple.
Once you have decided on the stain type that you want, get your tools ready. A paintbrush works well for applying stains because it allows you to spread the liquid evenly across the surface. After you're done painting, make sure to have some rags handy to remove any excess stain. If you intend to mix the stain yourself you will need enough containers to hold all the components.
After you have prepared your materials, clean the area you intend to stain. You can remove grime and dirt with warm water and soap. Wipe the entire piece of furniture with a rag dampened with clean water. You should remove any debris, especially if your plan is to stain darker wood.
Next, apply the stain. Next, apply the stain to the furniture by starting at one end. Move slowly and carefully along the grain of your wood until you reach its opposite end. Keep the stain from dripping off the wood's surface. Allow the stain to dry completely before you move on to the next step.
Clear polyurethane is used to protect the painted surfaces. Apply three coats polyurethane sealer. Allow the third coat, which should dry overnight, to dry before sanding.