Whittled wood can be used in many ways. This article will focus on carving whittled wooden, but it also includes tips and tricks for making flowers, utensils, or balls for bird cages. Here are some ideas to help beginners. Although softwoods are easiest to whittle you can progress to harder woods when you're more skilled. Wood with straight grain is more difficult to whittle than wood with many knots and multiple directions.
Carving whittled timber
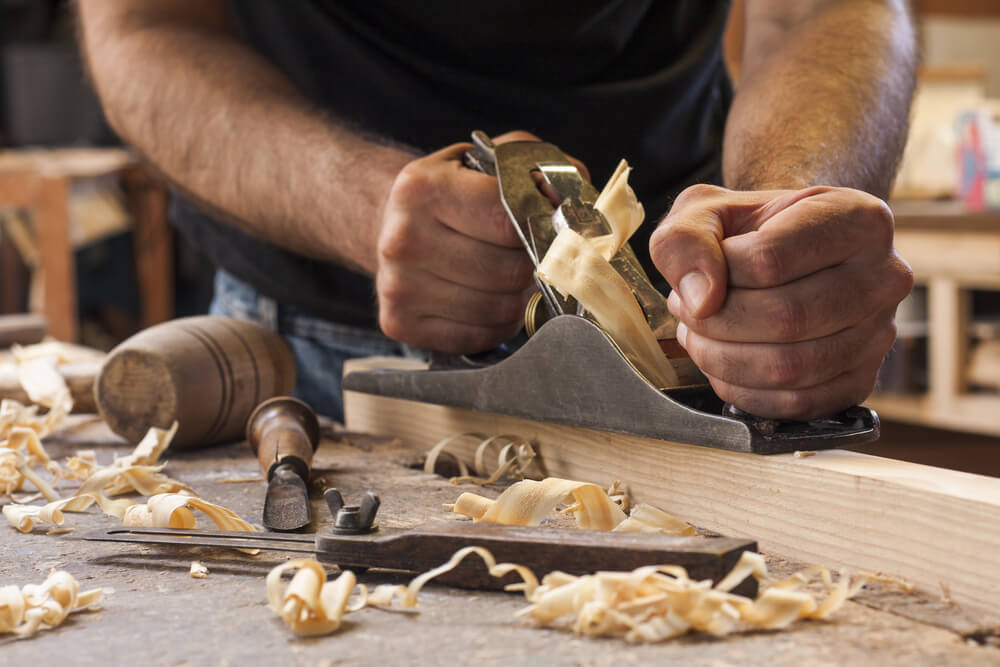
Whittling, one of many methods for woodcarving is easy to master and the most accessible. In fact, most people already own the tools needed to get started. These are some helpful tips if you're interested in learning how to carve wooden.
Whittling can be described as an artistic method of shaping and cutting wood. This involves removing small pieces of material from larger pieces and leaving the surface textured. Some projects are smoothed completely, while others are sanded and/or scraped. In both cases, you remove material from the original piece. There is no clamping, glueing, or joinery involved.

Whittled wood utensils
It's a great way to recycle pine wood that you don't want to throw away. Tom made a spoon and fork from the leftover southern pine wood from a wine rack. To create the spoon and fork shapes, Tom used a touge. He also used a coping and Japanese pull saw. Once he'd carved the shape, he used a sandpaper and a tack cloth to finish.
A pocketknife for whittling is an essential tool. Another essential tool is a crook and spoon knife. A folding saw and carving axe are also useful tools for removing large pieces of wood or large chunks of wood. For finishing, you will also need to have food-grade oil. You will need to have plenty of it, since the process can take as long as an hour.
Making whittled wood flowers
A sharp whittling knives is useful if you are carving flowers from wood. To carve flowers, keep your angle at approximately 85 degrees and your final cut at approximately 90 degrees. This can be repeated several times to create a more complex flower. Next, stick your finished flower onto a stick. You can always try another version if your first flower is not perfect.
Use boiled beeswax to give your flowers a final touch. A gouge can be used to achieve a more precise result. You should take care not to damage the wood using any of these tools. Safety must always come first. Make the petals in different colors and attach a flower pin to your back. You're almost done!

Making whittled wooden balls in a box
The ball-in cage is a classic trick toy. It is a loose ball that is cut to fit into a wooden frame. You can make one by simply measuring, marking, carving, and then smoothening the surface. The process also introduces the concept of carving a separate piece within the outer cage. This can be used for intricate jewelry, unique birdhouses, and many other woodworking projects.
Once the ball is done, it's time to shape it. For this purpose, a straight-cut chisel will be the best choice. This gives you greater control over the ball and makes it easier for you to cut along the grain. You can then remove the cage bars to shape the ball. Once the ball has taken form, it is time to finish the paring. To prevent accidental cuts, the woodworking tools must be sharpened. A pair of gloves is optional, but can be very helpful.
FAQ
Where do you start when it comes to woodworking?
The best way to learn how to build furniture is by building furniture. While you will need tools and make mistakes, you will eventually master the art of building furniture.
Begin by choosing the project that you want to finish. It could be something as simple as a box or as elaborate as a full-scale entertainment center. Once you've decided on a project, find a local woodworker who specializes in that kind of work. Ask them for their advice about the tools and where they can be found. Maybe you can ask the person if they know of anyone who does this sort of work.
What wooden items sell well?
Wood that has been harvested sustainably is the best-selling type of wood.
The most used wood types for furniture are oak, maple and walnut.
These woods are extremely strong but also have beautiful colors and grain patterns. They also last for many years if cared for properly.
To prevent moisture damage, wood furniture should always first be painted. This covers all surfaces, drawers included, as well as doors and handles.
You want your furniture to last as long as possible so you need to choose a paint that is water resistant.
Use a high-quality, oil-based primer and two coats of topcoat. You may need to apply several coats of top coat depending on how much wear it is expected.
Avoid spray cans and aerosol paints. These products can evaporate quickly and emit harmful fumes.
How can I organize my shop?
To keep your workshop tidy and organized, you should first create a place for tools storage. Make sure your tools are clean and free of debris and dust so they can be used properly. To hang accessories and tools, use pegboard hooks.
Are there any tips for starting a woodworking enterprise?
It's not easy to start your own woodworking business. However, if you are passionate about your hobby you will be willing to put in the effort. You'll enjoy the challenge and rewards of owning your own business.
When you are launching a new venture, it is important to be aware of the possibility that you will encounter unexpected difficulties. You may run out of money suddenly. Maybe customers won't be willing to pay what you want. To survive, you'll need to be prepared for such situations.
It is a good idea to create a separate bank account just for your company. This way, you'll always know exactly how much money you have coming in.
Statistics
- Average lumber prices rose about 600 percent between April 2020 and May 2021. (familyhandyman.com)
- Woodworkers on the lower end of that spectrum, the bottom 10% to be exact, make roughly $24,000 a year, while the top 10% makes $108,000. (zippia.com)
- If your lumber isn't as dry as you would like when you purchase it (over 22% in Glen Huey's opinion…probably over 10-15% in my opinion), then it's a good idea to let it acclimate to your workshop for a couple of weeks. (woodandshop.com)
- Overall employment of woodworkers is projected to grow 8 percent from 2020 to 2030, about as fast as the average for all occupations. (bls.gov)
External Links
How To
How to stain wood
Staining wood can be described as a process where chemicals are applied to the wood surface. This causes the wood to take on a new color. This chemical reaction causes the wood color to change from white and brownish red. Oak is the most commonly used wood for staining, but other woods can also be stained.
There are many ways to stain wood surfaces. One method involves mixing the stain and a solvent and then spraying it on the wood. Others use a solution made up of water and dye, which is then applied directly onto the wood. It is possible to mix stain into varnishes and paints, making it part of the finishing coat.
Preparing the surface for staining wood is the first step. You must clean the wood well to remove any grease or dirt that might interfere with the application of the stain. Sanding can smoothen out scratches and uneven spots. Then you must decide what kind of stain you want to use. There are two basic kinds of stains: penetrating stains and non-penetrating stains. Penetrating stain penetrates deeper into wood than nonpenetrating, making them suitable for dark colors like mahogany. Non-penetrating oils work best when used with light colors, like maple.
You will need to decide on the type of stain you want to use, and then prepare your tools. Because you can spread the stain evenly with a paintbrush, it is ideal for applying them. You should also have some handy rags to wipe up excess stains after you finish painting. If you plan on mixing the stain yourself make sure that you have enough containers to hold the different components.
After you have prepared your materials for staining, clean the area. You can remove grime and dirt with warm water and soap. Use a dampened sponge and warm water to clean the entire piece. If you intend to stain darker wood, make sure you get rid of any debris.
Next, spray the stain. The stain can be applied by spraying or brushing the stain onto one end of the furniture. Slowly and carefully move along the grain of wood, slowly but steadily, until you reach the other end. Keep the stain from dripping off the wood's surface. Before you proceed with the next steps, let the stain dry completely.
To protect the painted surface, apply a coat of clear polyurethane sealant. Apply three coats with polyurethane. Allow the third coat of polyurethane sealer to dry overnight before applying the final coat.