For beginners who want to learn how to whittle, it's possible to start with the basics. A knife, some tools, and wood are the best choices. This article will cover tools, techniques, as well as wood types. Once you understand the basics of whittling, you are ready to begin your own project. There are many types and styles of whittler projects.
Wood
Although there are many types of wood available, the following four woods are the best for whittling. This list of woods will help beginners get started in whittling. You can also whittle wood in many different ways to create different shapes. Here are some simple methods for whittling wooden objects.
The pull stroke is when you carve wood. Keep the blade parallel with the grain. This will ensure that the wood is not ripped. Dark streaks in the wood will indicate the direction of the grain. The direction of these streaks is the direction that the blade will cut when whittling the wood. The push stroke will cut through wood more effectively than the pull stroke.
Knife
If you're new to woodworking, whittling with a knife can be a good way to try your hand at the craft. Although you may not be an expert at this task, you will have greater control over your knife and can make more precise cuts. Practice the pull stroke, for example, by cutting small strips with a knife soap. Practice makes perfect. Beginer projects are easy to manage, but they get more difficult as you advance.
A knife is necessary before you begin whittling. A pocket knife is perfect as it is sharp enough that you can make razor-sharp shavings using a sharp blade. Avoid knives with wide, long blades, as these can cause choking and shouldn't be used for this task. A narrower bevel will make it easier for you to sharpen your knife. A frame saw can be used if needed.
Techniques
These techniques can help you improve your skills in whittling. The pull stroke is most common. This involves placing your right thumb onto the wood and pinching both your right and left fingers. Then you will draw the knife towards your right thumb while maintaining the knife straight. This stroke allows for quick control and a very short stroke. This is an excellent technique for making precise cuts.
There are 2 types of whittling guides. The Old Time Whittling books are the most popular. This book is great for beginning whittlers. The Little Book of Whittling has many whitling ideas. The Whittling Handbook also has many whittling projects. The Art of Whittling has some advanced projects. This book has simple puzzles as well as patterns such as ball-and-cage.
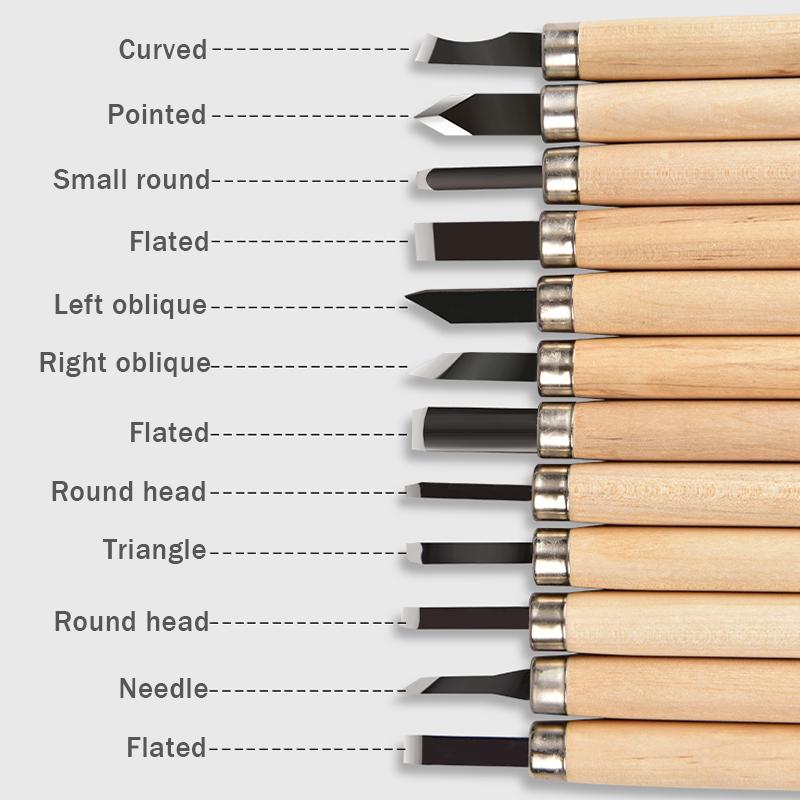
Tools
The first step in making whittling tools is to find good wood for your projects. You can use found wood, but it's best if you collect greenwood. Greenwood is easier than drying wood to carve. You can also gather deadfall branches at any given time. You can collect small trees at any time, but it's best to cut them in winter. Before you collect wood from private property, make sure to ask permission.
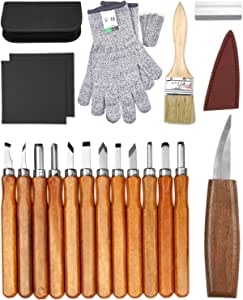
There are many great sets for beginners. One set that is great for beginners is the Delicacy carving set. It includes 12 tools and a blank wood spoon. The set includes protective gloves and a bag. A set of whittling instruments is worth the investment, as you will be using them for many years. This set is also a great way to get started.
For beginners
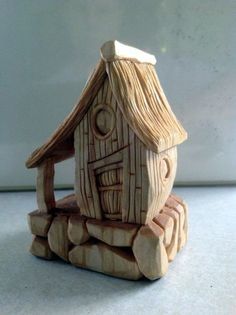
Start with a simple project if you are just starting out in wood whittling. You can progress to more complicated projects like carving faces on walking stick. Comfort Birdie is a bird that can provide comfort for beginning whittlers. Another beginner whittling idea is the swan. These are wonderful gifts for children and are very easy to make.
A carved ball inside a cage is another beginner project. You can create intricate designs with feathers, or match your theme with feathers. Tiki-icons and woodland spirits are also possible. The possibilities are endless, but it's always a good idea to have a template before you begin. This will help you to know which pieces and tools are appropriate.
FAQ
What kind of wood should you use?
The most commonly used woods for woodworking are oak, maple, cherry. Each type of wood has unique characteristics that affect the look and feel of the final product. Oak, for instance, is darker and harder than most other woods. Birch, which is lighter and soft, is more heavy than mahogany. There are two options: solid wood and veneers. Veneers are thin wood sheets that are glued together to form one layer.
Where can I buy hardwood lumber?
Home Depot offers hardwood lumber. You will find a range of wood products available at Home Depot.
You can also find a large selection of engineered hardwoods like Ipe (Araucaria Angustifolia), Brazilian Cherry, and Mahogany in their collection (Swietenia Macedonilla).
You can search Google for hardwood lumber to find them online.
Is it possible to refinish your own furniture?
Yes! There are plenty of ways to refinish old pieces of furniture without having to pay a pro. Here are some suggestions:
To remove stains and scratches, use sandpaper. Next, wipe the surface clean with a damp cloth.
Apply clear polyurethane varnish. Allow to dry completely before moving furniture.
Acrylic paint is a great way to paint furniture.
Stain can be used instead of paint. The furniture will get a rich look with the stain.
Use shellac wax. Wax will protect the wood and add shine.
What tools work best for me?
It's important to consider your preferences and needs when buying tools. Do you prefer metal or plastic handles What size of nails and screws do your hands use most? Would you rather use hand tools than power tools?
What type of tools does a carpenter use?
A hammer is probably the most widely used tool for carpenters. A hammer is used for pounding nails into wood. A hammer is used to hold pieces together during a project. Other tools include clamps. pliers. screwdrivers. measuring tape. pencils. saws. drills. wrenches.
How can a beginning woodworker make a living?
Many people are beginning to learn how build furniture to launch an online business. However, if you're just getting into furniture building, there are other options than selling on Etsy. You could sell at craft fairs or local events. Offering workshops could be another option for those who are interested in learning how to build their furniture. If you have experience as a carpenter or builder, you might consider offering services such as remodeling homes or creating custom pieces for clients.
Statistics
- Overall employment of woodworkers is projected to grow 8 percent from 2020 to 2030, about as fast as the average for all occupations. (bls.gov)
- The U.S. Bureau of Labor Statistics (BLS) estimates that the number of jobs for woodworkers will decline by 4% between 2019 and 2029. (indeed.com)
- If your lumber isn't as dry as you would like when you purchase it (over 22% in Glen Huey's opinion…probably over 10-15% in my opinion), then it's a good idea to let it acclimate to your workshop for a couple of weeks. (woodandshop.com)
- The best-paid 10 percent make $76,000, while the lowest-paid 10 percent make $34,000. (zippia.com)
External Links
How To
How to make wood joints
This tutorial will teach you how to join two pieces wood together. The "pocket hole joint" is a method whereby we drill holes into the wood and glue them together. This method works great if your wood is straight and smooth. If your wood isn't straight or flat, you might want to try another method, such as dowel joinery. Here are the steps
-
Drill Pocket Hole Joints. To start, measure and mark where you want to put the pocket hole joint. You will then drill 3/4" deep holes through each piece of wood with a jigsaw, handheld drilling machine, or hand-held drill.
-
Sand Smooth. Sanding the wood's edges will help ensure that the joint won't split later.
-
Glue together. Apply glue to both the ends of the wood. Allow the wood to rest for five minutes before clamping it together.
-
Attach the Pieces together. After the glue has dried you can attach the pieces to form a flush joint.
-
Trim Joinery. Trim any excess wood surrounding the joint once the glue has dried completely.
You should leave enough space between the pieces to allow you to turn them inside-out.